How To Make Grease Lubricant At Home: Astonishing Results
Make your own effective grease lubricant at home with simple ingredients and clear steps! This guide shows you how to create powerful DIY grease for various applications, ensuring smooth operation and lasting protection for your belongings.
Key Takeaways
- Understand basic grease ingredient functions.
- Safely mix oils and thickeners at home.
- Test your homemade grease for effectiveness.
- Apply DIY grease for lubrication needs.
- Store homemade lubricants properly.
- Learn when to buy commercial grease.
Are you looking for a way to keep your hinges from squeaking, your bike chain running smoothly, or your tools protected from rust? Sometimes, the answer isn’t a trip to the store, but right in your own kitchen or workshop. Making grease lubricant at home might sound complicated, but it’s surprisingly achievable. You can create effective solutions for many common lubrication needs using readily available components. This guide will break down the process, making it simple and safe for you to achieve astonishing results.
We’ll walk you through the science behind lubricants, the ingredients you’ll need, and the step-by-step process to create your own grease. Get ready to tackle those annoying squeaks and keep your valuable items in top working order!
Understanding Lubricants: The Basics You Need to Know
Before we dive into making your own grease formula, let’s quickly understand what lubricants do and why they are so important. Lubricants, at their core, are substances that reduce friction between moving surfaces. Imagine two pieces of metal rubbing against each other. Without anything in between, the friction would generate heat, wear down the surfaces, and eventually cause damage. Lubricants create a film that separates these surfaces, allowing them to slide past each other with minimal resistance.
Grease is a specific type of lubricant. Unlike oils, which are typically liquid, grease is a semi-solid. It’s made by combining a base oil with a thickening agent. This thickening agent gives grease its characteristic consistency, allowing it to cling to surfaces and stay in place, even on vertical or upside-down applications. This is why grease is perfect for lubricating gears, bearings, hinges, and other parts that need long-lasting lubrication without easily dripping away.
The effectiveness of a lubricant depends on several factors, including its ability to:
- Reduce friction.
- Withstand pressure without breaking down.
- Resist temperature changes.
- Protect against corrosion and wear.
- Remain stable over time.
Understanding these basic principles will help you appreciate why certain ingredients are chosen for homemade grease and how they contribute to its performance.
Why Make Grease Lubricant At Home?
You might be wondering, “Why bother making grease when I can buy it?” There are several compelling reasons why embarking on a do-it-yourself (DIY) lubrication project can be incredibly rewarding and practical.
Cost-Effectiveness
High-quality commercial greases can sometimes be expensive, especially if you need them for frequent use or for multiple applications. By using common household ingredients, you can significantly reduce the cost of lubrication. This is particularly beneficial for individuals who have many items requiring regular maintenance.
Ingredient Control and Customization
When you make your own grease, you have complete control over the ingredients. This allows you to avoid certain chemicals or additives that might be present in commercial products and that you might want to steer clear of, perhaps for environmental reasons or due to sensitivities. Furthermore, you can tailor the consistency and properties of your homemade grease to perfectly suit your specific needs. For instance, you might want a thicker grease for a heavy-duty application or a lighter one for delicate mechanisms.
Availability and Accessibility
Sometimes, you might find yourself in a situation where you urgently need a lubricant, but you can’t easily get to a store. Perhaps it’s late at night, you’re in a remote location, or there’s an unexpected emergency. Having the knowledge and basic ingredients to whip up a functional grease at home can be a lifesaver. It empowers you to solve immediate problems without delay.
Learning and Skill Development
Tackling DIY projects is always a great way to learn. Understanding how lubricants are formulated and how different components interact can be a fascinating educational experience. It builds practical skills that can be applied to a wide range of maintenance tasks, from household repairs to automotive care.
Environmental Friendliness
Depending on the ingredients you choose, homemade lubricants can sometimes be more environmentally friendly than their commercial counterparts. Many common ingredients are biodegradable, reducing your environmental impact. This aligns with a growing trend towards sustainable living and eco-conscious practices.
Essential Ingredients for Homemade Grease
To create effective grease lubricant at home, you’ll primarily need two types of ingredients: a base oil and a thickening agent. The combination and ratio of these will determine the final consistency and performance of your grease.
Base Oils
The base oil is the liquid component of the grease and provides the primary lubrication. You have several common and accessible options:
- Mineral Oils: These are petroleum-derived oils and are widely available. They come in various grades (viscosities). For general-purpose homemade grease, a medium-weight mineral oil (like SAE 30 or SAE 40 motor oil, though some prefer lighter versions if available) is a good starting point. These are generally stable and provide good lubrication.
- Vegetable Oils: Such as olive oil, canola oil, or castor oil. These are readily available and biodegradable, making them a greener option. However, they can go rancid over time if not stabilized, and their performance under extreme temperatures or heavy loads might be limited compared to mineral oils. Castor oil is known for its excellent lubricating properties and higher viscosity.
- Synthetic Oils: While less common for a simple DIY project and more expensive, synthetic oils (like silicone oil) can offer superior performance, especially at extreme temperatures. If you have some on hand, they can be excellent for specific applications but might complicate the thickening process.
Thickening Agents
The thickener is what gives grease its semi-solid consistency and helps it stay put. Here are some common and effective options:
- Petroleum Jelly (Vaseline): This is perhaps the easiest and most accessible thickener. It’s a semi-solid mixture of hydrocarbons that provides good lubrication and water resistance. It’s excellent for general-purpose use and is very beginner-friendly.
- Soap: This might sound surprising, but certain types of soap, when combined with oil and heated, can form a gel-like structure that acts as a thickener. Traditionally, lithium, calcium, or sodium soaps were used to create commercial grease. For DIY, simple bar soap grated and heated with oil can work, though the results can be less predictable and the stability might be lower.
- Waxes: Beeswax or paraffin wax can be melted and mixed with oil to create a thicker, more solid grease. Beeswax is a natural option. Waxes can improve water resistance and consistency but can also make the grease stiffer at lower temperatures.
- Starch or Flour: In a pinch, some people have experimented with common starches (like cornstarch) or even flour as a thickener. These are generally less effective and less durable for lubrication. They tend to break down quickly under pressure and heat, and can actually increase friction or clog mechanisms as they degrade. These are not recommended for serious lubrication tasks.
Optional Additives
Depending on your needs, you might also consider adding:
- Water: A small amount of water can sometimes help with the emulsification process when making soap-based greases, but too much can degrade many types of grease.
- Anti-corrosion agents: For items prone to rust, a drop of a rust inhibitor (if you have any dedicated products) could be added.
Simple DIY Grease Recipes for Astonishing Results
Let’s get hands-on! Here are a few straightforward recipes using readily available ingredients. Remember to always work in a well-ventilated area and wear appropriate safety gear.
Recipe 1: The Easiest Grease – Petroleum Jelly & Mineral Oil
This is the most beginner-friendly method and produces a versatile grease suitable for many household applications. It’s great for squeaky hinges, door latches, drawer slides, and even basic tool lubrication.
Ingredients:
- 1 part petroleum jelly (like Vaseline)
- 1 part mineral oil (a medium-weight oil, like SAE 30 or 40, or even some lighter machine oils if you have them)
Tools:
- Two clean bowls (preferably heat-resistant if you plan to warm the oil)
- A spoon or whisk for mixing
- Measuring cups or a kitchen scale for consistent ratios
- A clean container for storage
Instructions:
- Measure Ingredients: Carefully measure equal parts of petroleum jelly and mineral oil. For example, if you use 1/2 cup of petroleum jelly, use 1/2 cup of mineral oil.
- Combine: Place the petroleum jelly in a clean bowl. If your mineral oil is cold, you can gently warm it slightly (do not overheat) to make mixing easier.
- Mix Thoroughly: Gradually add the mineral oil to the petroleum jelly. Start mixing with a spoon or whisk. It might look lumpy at first.
- Work It: Continue mixing vigorously. The goal is to break down the petroleum jelly and incorporate the oil evenly. You’re essentially creating an emulsion. For better results, you can use a hand mixer or even a stand mixer on a low setting, but this is optional.
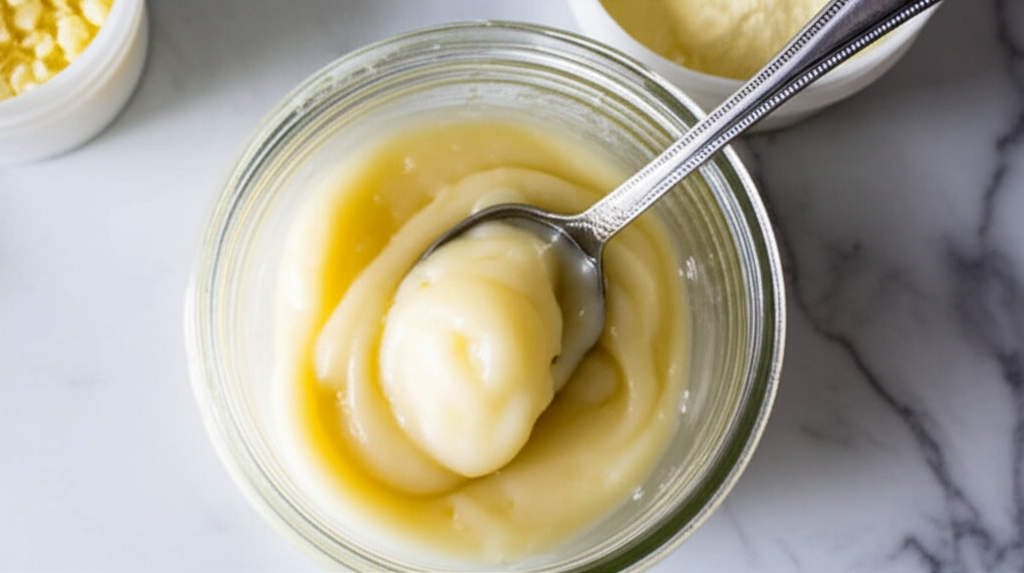
- Emulsify: Keep mixing until the mixture becomes smooth and creamy, with a consistent texture. This can take several minutes of diligent stirring. The petroleum jelly acts as the thickener, and the oil is the lubricant.
- Test Consistency: Dip a finger or a small tool into the grease. It should be a semi-solid that holds its shape but is spreadable. If it’s too stiff, add a tiny bit more mineral oil. If it’s too runny, try adding a bit more petroleum jelly, but mix thoroughly again.
- Store: Transfer your homemade grease to a clean, airtight container. Label it with the date and ingredients.
Recipe 2: Beeswax & Vegetable Oil Grease
This recipe uses natural ingredients and is a good choice for applications where you prefer something biodegradable. Beeswax also adds water resistance.
Ingredients:
- 1 part beeswax pellets (or finely grated beeswax)
- 4 parts vegetable oil (like olive oil, canola oil, or castor oil – castor oil tends to make a thicker grease)
Tools:
- Double boiler or a heat-safe bowl set over a pot of simmering water
- Stirring utensil (wooden spoon or heat-resistant spatula)
- Measuring cups
- Clean jar or container with a lid
Instructions:
- Prepare the Double Boiler: Fill the bottom pot of your double boiler with about an inch or two of water and bring it to a simmer.
- Melt the Beeswax: Place the beeswax pellets or grated beeswax into the top bowl of the double boiler. Let it melt slowly and completely.
- Add Vegetable Oil: Once the beeswax is fully melted, gradually add the vegetable oil while stirring continuously.
- Simmer and Stir: Continue to heat and stir the mixture gently for about 10-15 minutes. This helps the wax and oil to fully combine and emulsify. The longer you stir, the better the consistency might become.
- Check Consistency: Remove the bowl from the heat. The mixture will thicken as it cools. To test, place a drop on a cool surface. It should solidify into a grease-like consistency. If it’s too soft, you can return it to low heat and add a bit more beeswax. If it’s too stiff, add a little more oil and stir well.
- Cool and Store: Let the mixture cool completely before transferring it to your clean, airtight container. Label it appropriately.
Pro Tip: For the beeswax recipe, using castor oil as your vegetable oil will yield a grease with better load-carrying capacity and higher viscosity than lighter oils like olive or canola.
Recipe 3: Simple Lard Grease (Historical & Limited Use)
Historically, animal fats like lard were used as lubricants. This is a very basic, old-fashioned method, but its stability and performance are significantly limited compared to modern options. It’s best used for very temporary fixes or for historical reenactment purposes rather than for critical machinery.
Note: Lard can go rancid over time and may not perform well under extreme temperatures or heavy loads.
Ingredients:
- 1 cup lard (ensure it’s pure, rendered lard without added salt or other ingredients)
- 1/4 cup mineral oil (optional, to improve spreadability and longevity slightly)
Tools:
- Clean pot
- Stirring spoon
- Clean container
Instructions:
- Melt Lard: Gently melt the lard in a clean pot over low heat. Do not let it fry or burn.
- Add Oil (Optional): If using, stir in the mineral oil until well combined with the melted lard.
- Cool and Mix: Remove from heat. Stir occasionally as it cools to help create a smoother, more uniform texture.
- Store: Once completely cooled, store in a clean, airtight container. Use within a few weeks for best results.
Testing Your Homemade Grease
Before you apply your homemade grease to something important, it’s wise to test its performance. This helps you gauge its effectiveness and identify any need for adjustments.
Consistency Check
The most basic test is to see if the grease holds its form.
- Take a small amount on your finger or a tool.
- It should not immediately run off or drip.
- It should be pliable enough to spread easily without crumbling or separating.
Lubrication Test
Find a simple, non-critical application to test the lubrication properties.
- Hinge Test: Apply a small amount to a squeaky hinge on a shed door or a utility cabinet.
- Tool Test: Apply a thin layer to an unpainted metal tool that’s prone to rust, like a trowel or a shovel.
- Observe: See how well it reduces squeaking or friction. Does it stay in place? Does it seem to protect the metal?
Water Resistance Test (for beeswax/petroleum jelly recipes)
Dip a small amount of your homemade grease into water for a few minutes.
- Does it wash away easily?
- Does it maintain its consistency relatively well?
- Greases with higher petroleum jelly or beeswax content will generally perform better here.
Temperature Test (Improvised)
Place a small sample of your grease in a cool place (like a refrigerator for a short period) and then in a slightly warmer place (like a sunny windowsill). Note how its consistency changes. A good grease remains somewhat usable over a reasonable temperature range.
Applying Your Homemade Grease Lubricant
Once you’re satisfied with your homemade grease, applying it is straightforward. The key is to use the correct amount and ensure it gets to where it’s needed.
Clean the Surface First
Before applying any lubricant, ensure the surfaces you’re treating are clean. Remove any dirt, rust, old grease, or debris. This is crucial because old grime mixed with new grease can be abrasive and actually increase wear.
Application Methods
- Direct Application: For hinges, simple pivots, or exposed gears, you can often apply the grease directly with your finger, a small spatula, or a clean cloth. Use just enough to coat the surfaces.
- Tool Method: For tools, spread a thin, even layer over the metal parts.
- Squeeze Bottle: If your homemade grease is a bit runnier, you might be able to put it into a clean, empty squeeze bottle for more controlled application in tight spots.
Focus on Friction Points: Apply the grease to the areas where two parts rub against each other. For example, on a hinge, apply it to the pin and the surfaces where it contacts the hinge leaves.
Amount Matters
Don’t overdo it. Too much grease can attract dirt and dust, and in some mechanisms, it can hinder performance. A thin, consistent film is usually all that’s needed.
Storage and Shelf Life of Homemade Grease
Proper storage is key to extending the life and effectiveness of your homemade lubricant.
Containers
Use clean, airtight containers. Glass jars with screw-on lids, small plastic tubs with snap-on lids, or even repurposed clean food containers work well. This prevents contamination, evaporation, and drying out.
Environment
Store your homemade grease in a cool, dry place away from direct sunlight. Extreme temperatures can degrade the ingredients or alter the consistency.
Shelf Life
The shelf life of homemade grease varies greatly depending on the ingredients:
- Petroleum Jelly-based: These generally have the longest shelf life, potentially lasting for a year or more if stored properly.
- Beeswax-based: These also tend to be quite stable and can last for many months to over a year.
- Vegetable Oil-based (without thickener): If you just use oil, it can oxidize and go rancid faster. With beeswax, it’s more stable.
- Lard/Animal Fat-based: These have the shortest shelf life and are prone to rancidity. They are best made in small batches and used within a few weeks or months.
Always inspect your homemade grease before use. If it smells off, has separated significantly, or has changed color, it’s best to discard it and make a fresh batch.
When to Use Commercial Grease
While making grease at home is fantastic for many situations, it’s important to know its limitations. For certain applications, commercial greases are superior and often necessary.
High-Performance Requirements
Commercial lubricants are formulated with specific additives to handle extreme pressures, high temperatures, or very low temperatures. If your application involves heavy machinery, automotive components (like wheel bearings or CV joints), or situations with significant shock loads, a specialized commercial grease (e.g., lithium complex, moly grease) is essential for safety and optimal performance. These additives are difficult to replicate in a home setting.
For instance, automotive wheel bearings require grease that can withstand extreme heat generated by friction and the weight of the vehicle. A homemade grease would likely fail catastrophically in such a scenario. The American Petroleum Institute (API) has standards for various lubricants, and commercial products are designed to meet these rigorous specifications.
Long-Term Stability and Consistency
Commercial greases undergo extensive testing to ensure they remain stable and effective over long periods and across wide temperature ranges. Their complex formulations are designed to prevent separation and maintain consistent viscosity, which can be challenging to achieve with simple DIY recipes.
Specific Applications
Some applications require very specific types of grease. For example:
- Food-Grade Lubricants: Used in food processing machinery, these must be non-toxic and comply with strict regulations.
- High-Temperature Greases: Designed for ovens, furnaces, or engine components.
- Low-Friction Greases: Used in electronics or sensitive moving parts.
- Biodegradable Greases: Engineered for environmentally sensitive areas.
You simply cannot replicate these specialized properties at home with common ingredients.
When in Doubt, Buy
If you’re unsure about the requirements of an application, or if the failure of the lubricant could lead to damage, injury, or significant expense, it is always safest to purchase a commercial grease designed for that specific purpose. Reputable brands offer a wide range of products tested for reliability.
Frequently Asked Questions (FAQ)
Q1: Can I use cooking oil as a lubricant instead of mineral oil?
A1: You can use vegetable cooking oils (like olive oil or canola oil) as the base oil for some simple homemade greases, especially when combined with a thickener like petroleum jelly or beeswax. However, cooking oils can go rancid over time and may not perform as well under high heat or pressure compared to mineral oils. They are best for less demanding applications and should be made in smaller batches.
Q2: How do I know if my homemade grease is working well?
A2: A good homemade grease should reduce friction, stay in place without dripping excessively, and not break down or separate easily. You can test it by applying it to a squeaky hinge or a tool and observing its performance over a short period. If the squeak disappears and the grease stays put, it’s likely working for that application.
Q3: Can I make grease for my car with household ingredients?
A3: It is strongly recommended NOT to use homemade grease for critical automotive parts like wheel bearings, ball joints, or CV joints. These components operate under extreme conditions of heat, pressure, and load. Commercial automotive greases are specially formulated and rigorously tested to meet these demands safely. Using homemade grease in these applications can lead to premature wear, component failure, and potentially dangerous situations.
Q4: My homemade grease looks separated. What went wrong?
A4: Separation often occurs when the oil and thickener haven’t fully emulsified or if the mixture has been exposed to extreme temperatures. Ensure you mix the ingredients thoroughly, especially if using heat. For petroleum jelly-based greases, vigorous mixing or even a short time in a stand mixer can help. For soap-based or wax-based greases, re-heating and remixing might help, but sometimes the ratio might be off.
Q5: How long will homemade grease last?
A5: The shelf life depends on the ingredients. Petroleum jelly and beeswax-based greases, when stored in an airtight container in a cool, dry place, can last for many months to over a year. Greases made with pure vegetable oils or animal fats will have a shorter shelf life, as they are more prone to oxidation and rancidity, and should be used within weeks or a few months.
Q6: Is homemade grease safe for personal care applications?
A6: While petroleum jelly is commonly used in personal care, it’s essential to be cautious. The mineral oil used in DIY recipes might not be of the same purity or grade as pharmaceutical-grade petroleum jelly. If you’re making grease for personal use, stick to 100% pure petroleum jelly or very high-quality, food-grade vegetable oils and ensure all tools and containers are meticulously clean to avoid contamination. For sensitive personal applications, commercially produced and tested products are generally safer.
Conclusion: Empowering Your Maintenance Routine
Making grease lubricant at home is a rewarding and practical skill. With simple ingredients like petroleum jelly, mineral oil, or beeswax, you can create effective solutions for a wide range of common lubrication needs. From silencing squeaky doors to protecting your tools, DIY grease offers a cost-effective and customizable alternative to commercial products.
Remember to always prioritize safety, understand the limitations of your homemade mixtures, and test their performance before widespread use. For high-stress or critical applications, always opt for specialized commercial lubricants. But for everyday tasks and general maintenance, the astonishing results you can achieve with your own homemade grease will empower you to keep your belongings running smoothly and efficiently.